

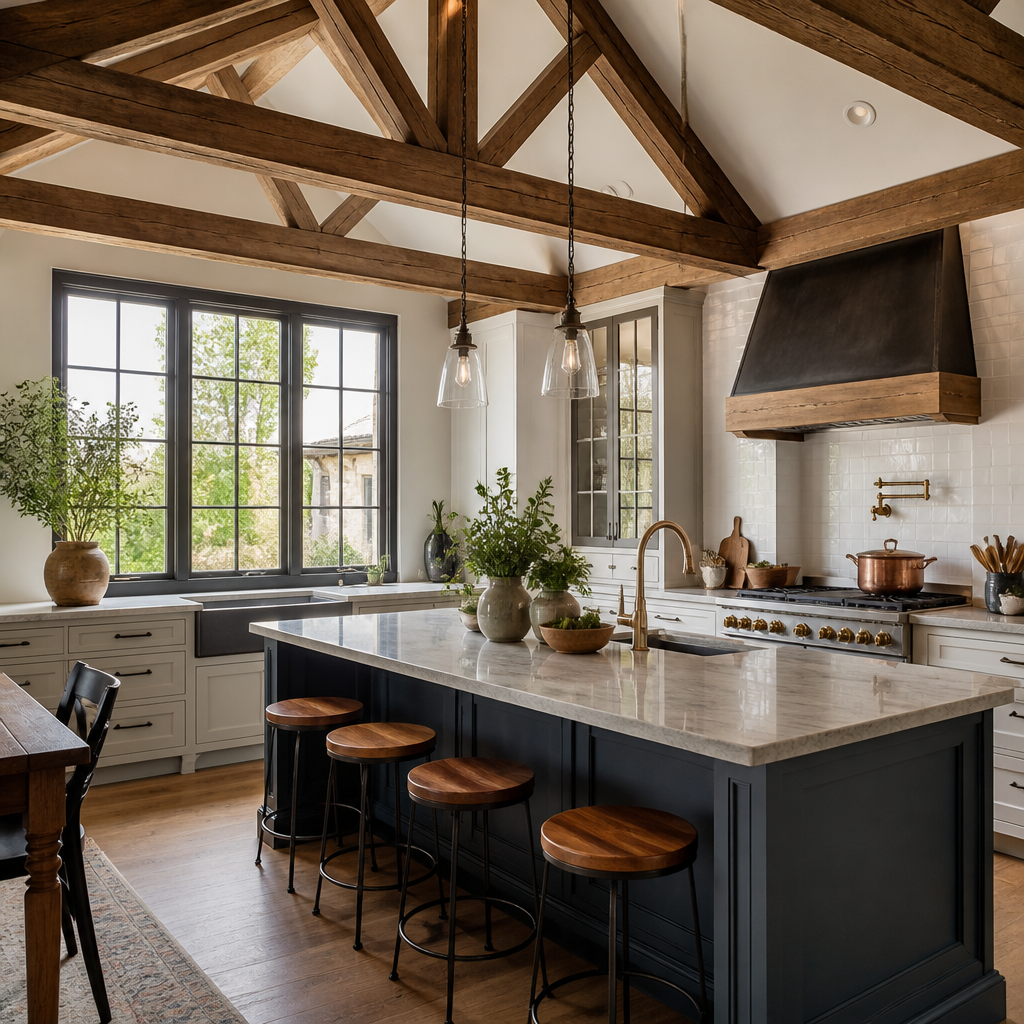
Exposed ceiling beams have become one of the most sought-after architectural features in modern kitchen design, offering a striking blend of rustic charm and contemporary sophistication. Whether you’re renovating an older home or building new, the addition of visible overhead beams can completely alter the visual weight and character of your kitchen space, turning a standard room into something with genuine architectural presence.
The Visual Impact of Overhead Structure
Ceiling beams draw the eye upward and create a sense of volume that flat ceilings simply cannot match. In kitchens with standard eight-foot ceilings, even decorative beams can add perceived height by creating layers and shadow lines that break up monotonous expanses. For rooms with vaulted or cathedral ceilings, beams serve the opposite purpose: they anchor the space and prevent it from feeling too vast or disconnected from the rest of the home.
The direction of your beams matters considerably. Beams running parallel to the longest wall can make a narrow kitchen feel even more elongated, while perpendicular placement creates a more balanced proportion. In square or L-shaped kitchens, a grid pattern can define distinct zones for cooking, dining, and circulation without the need for physical barriers.
Coordinating Beams with Cabinet Finishes
The relationship between your ceiling beams and cabinetry sets the entire tone of the kitchen. Darker beams against lighter ceilings create dramatic contrast, but this approach works best when cabinet colors fall somewhere in the middle of that spectrum. A kitchen with white or cream cabinetry and dark espresso beams can feel stark unless you introduce wood tones elsewhere through flooring, open shelving, or furniture pieces.
For those working with cream or off-white cabinetry, natural wood beams in honey or medium tones offer a more harmonious approach. The warmth of the wood complements rather than competes with the soft cabinet colour, creating a layered look that feels collected rather than overly coordinated. This combination works particularly well in farmhouse, transitional, and modern rustic designs where the goal is approachable elegance rather than high contrast.
Matching Wood Species and Grain
If you’re introducing new beams to match existing woodwork, pay attention not just to colour but to grain pattern and texture. Oak has a pronounced grain with visible rays and pores, while maple is fine and even. Douglas fir shows distinct growth rings and a linear grain, and cedar offers a softer, more textured appearance. Mixing species can work when finishes are adjusted to coordinate, but within a single sightline, consistency reads as more intentional.
Structural Versus Decorative Beams
True structural beams carry the weight of the roof or upper floors and are typically solid timber, engineered lumber, or steel encased in wood. Exposing existing structural beams during a renovation can be cost-effective, but you’ll inherit whatever spacing and dimensions the framing dictates. These beams may be unevenly spaced or sized differently than what current aesthetics would suggest, and modifications require structural engineering input.
Decorative beams, by contrast, offer complete flexibility in placement, size, and spacing. Hollow box beams made from solid wood panels weigh a fraction of solid timbers and can be installed without reinforcing the ceiling structure, making them practical for retrofit applications. The visual effect is identical to solid beams from ground level, and the installation process is far simpler, typically involving mounting brackets secured to ceiling joists.
For kitchens where authentic timber character matters, companies such as Tar River Timber Works manufacture wood box beams in species like Douglas fir and Western red cedar, milled to show the natural grain and texture of solid wood while keeping weight and cost manageable. These products work well in both new construction and renovation projects where the goal is architectural authenticity without the structural complications of solid beams.
Beam Sizing and Spacing Guidelines
Proportion matters more than strict rules, but general guidelines help prevent beams from looking either spindly or oppressive. For standard eight- to nine-foot ceilings, beams between six and eight inches in height and four to six inches in width tend to read as substantial without overwhelming the space. Taller ceilings can accommodate deeper beams—ten to twelve inches or more—which helps maintain visual balance as the ceiling height increases.
Spacing depends on the effect you want. Beams placed four to six feet apart create a strong rhythmic pattern that defines the ceiling plane. Wider spacing—eight to ten feet—offers a more subtle effect, with beams serving as accents rather than dominant features. Asymmetrical placement can work in kitchens with irregular layouts, where beams might emphasize certain zones like a cooking area or island rather than covering the entire ceiling uniformly.
Installation Considerations and Methods
Mounting methods vary depending on whether you’re working with solid or hollow beams. Solid beams require substantial blocking or steel brackets secured into multiple ceiling joists, as a single sixteen-foot beam can weigh several hundred pounds. The installation process typically involves temporary support posts and multiple workers to position and secure the timbers safely.
Hollow box beams use a cleat system: wooden mounting strips are screwed into the ceiling joists, and the three-sided beam slides over the cleats and is secured from below or through the sides. This method allows a single installer to handle most beams and eliminates the need for heavy lifting equipment. The seams where the beam meets the ceiling can be caulked and painted to disappear, or left with a small reveal for a more defined look.
Routing Utilities Through Beams
One practical advantage of hollow beams is the ability to conceal wiring, low-voltage cables, or even small plumbing runs. Recessed lighting fixtures can be mounted to shine up-beam or down, creating grazing light across the wood surface or illuminating the ceiling between beams. If you plan to run utilities through beams, coordinate the mounting cleat placement to leave adequate space for conduit or junction boxes before the beam is installed.
Finishing and Maintenance Over Time
Kitchen environments expose wood beams to heat, humidity, and airborne grease. Unsealed beams will darken and develop patina, which many homeowners find desirable, but grease accumulation near cooking zones can become problematic. Pre-finishing with a clear polyurethane or hard wax oil creates a wipeable surface that resists staining while allowing the wood texture to remain visible.
For painted beams, semi-gloss or satin finishes hold up better than flat paint in kitchens and can be wiped clean without marking. Touch-ups are easier when you keep a small amount of the original paint on hand, as custom colours are difficult to match later. Wood beams that will remain natural should be dusted regularly with a microfiber cloth or vacuum attachment, and any grease spots can be removed with a wood-safe cleaner or a mild soap solution.
Final Thoughts on Beam Integration
Exposed beams are not purely decorative additions—they shape how you experience the kitchen spatially and set expectations for the rest of the home’s design language. A kitchen with strong overhead timber presence calls for equally thoughtful material choices elsewhere: substantial hardware, quality countertop materials, and fixtures that feel permanent rather than trendy. When these elements align, the beams enhance rather than dominate, creating a kitchen that feels complete and intentional from every angle.